廣告

2015年12月16日 星期三

html5 data-attribute


以往JavaScript和CSS都要透過id或是class和HTML產生關聯, 造成典型的問題就是一個CSS的style用不到了, 但是怕刪除class讓JS失效. 目前最新的解法是:JavaScript少class。 改用 HTML5 data- attributes 來當JS和HTML之間的橋梁 Twitter Bootstrap: css => class="nav nav-tabs" js =>

優點:
1.可以定義一些不需要顯示在前端的資訊(ex:id)
2.分離js , html ,css

ref:
https://www.christianheilmann.com/2012/10/10/data-attributes-rock-as-both-css-and-javascript-know-them/

http://minipai.tumblr.com/post/34152230626/%E6%9C%AA%E4%BE%86%E5%8F%AF%E8%83%BD%E6%9C%83%E7%94%A8%E5%89%8D%E7%AB%AF%E5%88%86%E9%9B%A2%E8%A1%93

http://sincode.blogspot.tw/2014/09/html5-data-data.html

https://hacks.mozilla.org/2012/10/using-data-attributes-in-javascript-and-css/

2015年11月19日 星期四

[android] Use "meta-data" from AndroidManifest.xml

想說第三方的app key參數都放在<meta-data >裡
但如果value直過大時(46464646464123),
ex:
<meta-data
    android :name="API_KEY"
    android :value="46464646464123 " />
此時直接從程式裡引用此值會出錯.

解法:
<meta-data android:name="zoo" android:value="@string/kangaroo" />

benefits:

2015年10月24日 星期六

Open new tab without popup blocker after ajax call on user click | 用ajax開新tab時,避免瀏覽器會詢問是否可開

是這樣的,我網頁上有個按鈕,點擊時會去
用jquery的ajax http get 去跟後端取資料,
並且取得後會開啟一個新分頁.

此時有個現象,
當ajax http get裡面的參數"async"設為true,
開新分頁時,browser 會問你可不可以跳視窗.

當ajax http get裡面的參數"async"設為false,
開新分頁時,browser 就不會問,而是直接地就
開啟新分頁.

PS:開啟新分頁是用window.open(url, '_blank')

以下為網友"Kenqr"的回答:
非由使用者的操作直接引發的開新視窗 瀏覽器會詢問,
點按鈕後直接開新視窗會被視為是使用者的操作引發的,
但async true時會在另一個thread執行,就不會被當成是使用者的操作,
可以改成點擊後直接開新分頁,新分頁裡再用ajax讀資料,
或是先開新分頁,原分頁讀到資料後再傳給新分頁應該也行
==================================
ref:http://stackoverflow.com/questions/18885676/open-new-tab-without-popup-blocker-after-ajax-call-on-user-click


2015年10月23日 星期五

Change the URI (URL) for a remote Git repository | 修改git remote的網址

有兩個方法:
1. edit .git/config and change the URLs there.

2. git remote set-url origin git://new.url.here


================================
show current remote url
git config --get remote.origin.url

2015年10月15日 星期四

AdBlock plus hids elements with ids or class with the word “ad”

chrome如果有裝adBlock的話在,html中 class的命名盡量不要出現以下相關字眼. => *ad*,*banner* 來源(https://easylist-downloads.adblockplus.org/easylist.txt)

2015年9月14日 星期一

[js] use jquery simulate trigger click event


jQuery(document).ready(function(){
    jQuery('#foo').on('click', function(){
         jQuery('#bar').simulateClick('click');
    });
});

jQuery.fn.simulateClick = function() {
    return this.each(function() {
        if('createEvent' in document) {
            var doc = this.ownerDocument,
                evt = doc.createEvent('MouseEvents');
            evt.initMouseEvent('click', true, true, doc.defaultView, 1, 0, 0, 0, 0, false, false, false, false, 0, null);
            this.dispatchEvent(evt);
        } else {
            this.click(); // IE Boss!
        }
    });
}


Purpose:simulate click function,
i use for bind of dynamic load page.

[js] pass parameter between two web app


flow:web_A pass parameter to web_B

method: use http get
.in web_A 's js file
   
   var url = "url?"+window.abStoreUserToken+"="+data[0]['userToken'];
   window.location = url;  
    
.in web_B 's js file

   //handle url redirect
    var hashTagQuery = handleHashTagString(window.location.search);
   
   //get parameter from another web 
    if(hashTagQuery['abStoreUserToken']!=null){
         sessionStorage.setItem(window.abStoreUserToken, _toJSONString(hashTagQuery['abStoreUserToken']));
    }
  
   //change url without reload, and clear ori url from history
    window.history.replaceState("object or string", "Title", "url without parameter" );


ref:
http://www.myexception.cn/javascript/249482.html
http://stackoverflow.com/questions/1961069/getting-value-get-or-post-variable-using-javascript

2015年9月8日 星期二

jquery screen resize event


    $(window).on('resize', function() {
        var win = $(this); //this = window
        console.log(win.height());
        console.log(win.width());
    });

Purpose:Do things when screen be resized

close modal when url is change (use hashchange event)


    $(window).on('hashchange', function(e) {

        console.log("hashchange");
     
        $('#playAudioModal').modal('hide');

    });  


Purpose:Do things when  when url is change

bootstrap set navtabs border


.nav-tabs > li.active > a, .nav-tabs > li.active > a:hover, .nav-tabs > li.active > a:focus {
{
    border-color: #DDDDDD #DDDDDD transparent;
}

ref:
http://stackoverflow.com/questions/18949634/bootstrap-3-strange-thin-line-under-navtabs-in-firefox

bootstrap modal close event


$(document).on('hidden.bs.modal', '#your_modal_id', function() {
        console.log("you can do things here");
    });
  
Purpose:Do things when modal closed

get index of selected option with jQuery


//Just use the selectedIndex property of the DOM element:

 alert($("#dropDownMenuKategorie")[0].selectedIndex);

//reason:
// property. Adding [0] converts the jquery object 
to a javascript object which has the selectedIndex property. 
This example won't work without [0] 


more detail about selectedIndex
http://www.w3school.com.cn/jsref/prop_select_selectedindex.asp

Purpose:
as title

2015年8月29日 星期六

[粗心] html avoid side-effect when use jquery clone

我在動態新增element(購物車,搜尋結果等等頁面)時,
會先寫一個template用來clone用,

但是發現為何css的呈現都會用最後一筆的樣子
找了clone用法https://api.jquery.com/clone/
也跟他無關,後來發現是自己犯傻了.

原因說明詳見下面範例註解處.


範例

    template    += ' ';
    template    += '  
'; template += '
'; template += ' '; template += ' '; template += '
'; template += '
'; template += '
'; $template = $(template); for (i = 0; i < channelItemJson.length; i++) { var $newItemCol = $template.clone(); $newItemCol.find('img').attr('src', window.itemImgPreUrl + channelItemJson[i]['localCoverPath']); $newItemCol.find('p').text(channelItemJson[i]['name']); $newItemCol.find(".channel-item-detail").on("click", { elements: $newItemCol, }, handler2ItemDetail); //$('.search-all-price-group').show(); //this strategy will cause side-effect //beacuse there are many '.search-all-price-group' class //this is right $newItemCol.find('.search-all-price-group').show(); $("#scroll-container").append($newItemCol.fadeIn()); }

2015年8月23日 星期日

LiveReload with Sublime Text 3

1.
下載
https://github.com/Grafikart/ST3-LiveReload

2.
解壓縮後改名成LiveReload

3.
放到C:\Users\lewis\AppData\Roaming\Sublime Text 3\Packages\
(Preferneces->Browse Settings)

4.
改Settings-Default
Preferneces->Package settings ->Settings-Default
{
    "enabled_plugins": [
        "SimpleReloadPlugin",
        "SimpleRefresh"
    ]
}

5.
chrome的擴充套件
https://chrome.google.com/webstore/detail/livereload/jnihajbhpnppcggbcgedagnkighmdlei
(成功後空心icon會變為實心)


2015年8月22日 星期六

difference between local storage and session storage / local storage session storage 的不同

在跳轉頁面時不想要跟server重要資料,
或是要將上個頁面的大量資料帶到下個頁面,
此時可以用 local storage  and session storage,
這兩這有何不同?

A:前者在瀏覽器關掉時資料還會被保存,後者則不會.

保存方式為key-value的形式,用法


參考:
http://stackoverflow.com/questions/19867599/what-is-the-difference-between-localstorage-sessionstorage-session-and-cookies
http://jerryzou.com/posts/cookie-and-web-storage/

CSS3 pointer-events

最近寫前端時想要一個功能是可以模仿bootstrap modal,
但又想做到可以支持上一頁下一頁的功能,
於是用了CSS3 pointer-events 這屬性,
有點像是android的frame layout
主要是參考這篇http://www.oxxostudio.tw/articles/201409/pointer-events.html


這邊直接在jsfiddle做測試


  • pointer-events: none=> 此時ybox 不會有hover效果,並且將滑鼠移到 ybox& gbox交界處時gbox就會有反應.
  • pointer-events: auto=>此時 ybox& gbox都會有hover效果,並且將滑鼠移到 ybox& gbox交界處時只有ybox才有反應.


.html


.js

.ybox {
    position: relative;
    width: 40px;
    height: 100px;
    background: rgba(255, 200, 0,1);
    z-index: 1;
    margin-top: 30px;
    pointer-events: none;
    //pointer-events: auto;
}

.ybox:hover{
  background: rgba(0, 50, 100, .8);
}

.gbox {
    
    position: absolute;
    top: 0; left: 0;
    width: 200px;
    height: 50px;
    background: rgba(0, 220, 170, 1);
    z-index: 0;
}
.gbox:hover{
  background: rgba(0, 50, 100, .8);
}


2015年8月21日 星期五

[jquery] prevent a parent's onclick event from firing when a child anchor is clicked


.html


.js
$("#clickable a").click(function(e) {
   //do something
   e.stopPropagation();
})


$("#clickable").click(function(e) {
   //do something
   alert('clickable');
})
here is link that you test
http://jsfiddle.net/grp10d10/1/

2015年8月6日 星期四

用bootstrap grid中的offset的特性 達到元件置中的效果


在grid system row裡,一行滿的話是12(col-md-12).
如果現在要將一個元件(col-md-8)
放入此row,則此元件會靠左.

要如何將其置中?

首先把12格想成分成每2格為一個,
所以總共有6個.
所以col-md-8佔了4個,

此時在元件加入屬性(col-md-offset-2)
他就會往右兩格.
這樣就達到置中的效果了.

式意圖.
|--|==|==|==|==|--|

==================
參考http://getbootstrap.com/css/

2015年7月24日 星期五

[linux] how to get log of rc.local


add below script to your /etc/rc.local

exec 2> /tmp/rc.local.log  # send stderr from rc.local to a log file
exec 1>&2                  # send stdout to the same log file
set -x                     # tell sh to display commands before execution


2015年7月23日 星期四

前端開發的套件管理工具 bower | Front-end package manager -Bower


Bower is a front-end package manager built by Twitter. 
Also known as a Package manager for the Web, bower is used in 
modern open source and closed source projects to solve many recurrent issues.


install bower
$npm install -g bower
(need install node.js,git)

常用指令
 install package
  $bower install $package

 show current veresion and latest version 
  $bower list
   ex:
    startbootstrap-sb-admin-2#1.0.7 C:\Users\1409035\git\MartBackStage
    ├─┬ bootstrap#3.3.4 (3.3.5 available)
    │ └── jquery#2.1.3 (3.0.0-alpha1+compat available)
    ├─┬ bootstrap-social#4.8.0 (latest is 4.9.1)
    │ ├── bootstrap#3.3.4 (3.3.5 available)
    │ └── font-awesome#4.2.0 (latest is 4.3.0)
    ├─┬ datatables#1.10.6 (1.10.7 available)
    │ └── jquery#2.1.3 (3.0.0-alpha1+compat available)
    ├── datatables-plugins#1.0.1 (latest is 1.10.7)
    ├─┬ datatables-responsive#1.0.5 (1.0.6 available)
    │ ├── datatables#1.10.6 (1.10.7 available)
    │ └── jquery#2.1.3
    ├─┬ flot#0.8.3
    │ └── jquery#2.1.3 (3.0.0-alpha1+compat available)
    ├── flot.tooltip#0.8.4 (0.8.5 available)
    ├── font-awesome#4.2.0 (latest is 4.3.0)
    ├── holderjs#2.4.1 (latest is 2.8.1)
    ├─┬ jquery-ui#1.11.4 extraneous
    │ └── jquery#2.1.3 (3.0.0-alpha1+compat available)
    ├─┬ metisMenu#1.1.3 (latest is 2.0.2)
    │ └── bootstrap#3.3.4 (3.3.5 available)
    └─┬ morrisjs#0.5.1
      ├── jquery#2.1.3 (3.0.0-alpha1+compat available)
      ├── mocha#1.17.1 (latest is 2.2.5)
      └── raphael#2.1.4

 uninstall package
  $bower uninstall $package
  
 update package
  $bower update $package


conclusion:
In the past, when we want to use the plugin,
must first go to the website to download and 
unzip it to your purpose folder,

And you have to keep track of plug has not been updated,
If so, you have to repeat the action again.

now! use bower, you do not have to worry about this problem.


2015年7月16日 星期四

[js] JQuery same click event for multiple elements


$('.class2 , .class3, .class3').on('click', function() { 
  alert(this.className);
  location.href = "test.htm"; 
});

2015年7月14日 星期二

[js] 移除jsonArray 當中某一項 | remove specific object from json arrray


var countries = {};

countries.results = [
    {id:'AF',name:'Afghanistan'},
    {id:'AL',name:'Albania'},
    {id:'DZ',name:'Algeria'}
];


Array.prototype.removeValue = function(name, value){
   var array = $.map(this, function(v,i){
      return v[name] === value ? null : v;
   });
   this.length = 0; //clear original array
   this.push.apply(this, array); //push all elements except the one we want to delete
}

說明:

countries.results.removeValue('name', 'Albania');
//移除掉key為'name' ,value為'Albania' 的那項item

Array.prototype.removeValue
//為Array這個object增加removeValue這個function.

var array = $.map(this, function(v,i){
     return v[name] === value ? null : v;
});
//jquery的traversing object功能, callback function裡面
//可以程式來對object做動作,做完再回傳到呼叫他的地方.

this.push.apply(this,array)
//將array所有內容家到原本的array裡面,
你可以想成jabva的 addAll


總結:
說穿了其實就是把json array 用for-loop跑完,
將符合標準的取出. 
最後再放回json array裡面


//===============================================================
ref:
http://api.jquery.com/jquery.map/
http://codex.wiki/post/147898-659/
http://stackoverflow.com/questions/1374126/how-to-extend-an-existing-javascript-array-with-another-array


2015年7月8日 星期三

jQuery用load方法加入的html無法bind on event


   假設 navbar-brand 為用jquery load進來的html
    
    此時下面寫法無法執行
    $("a.navbar-brand").on("click", function() {
        //code here

    });
    
    解法一
    不要用jquery load 進html,

    解法二
    Event Delegation
    ex:
    $(document).on("click", 'a.navbar-brand', function() {
      //code here

    });


ref:http://www.cnblogs.com/moonreplace/archive/2012/10/09/2717136.html

2015年6月27日 星期六

Cross origin requests are only supported for protocol schemes: http, data, chrome, chrome-extension, https, chrome-extension-resource.


solve way: add flag to chrome

1.
 cd to your chrome.exe path

2. type cmd
 window
 .\chrome.exe --allow-file-access-from-files
 mac
 open /Applications/Google\ Chrome.app/ --args --disable-web-security

3.
 close all chrome instance
 
4. check work
chrome://version/

2015年6月18日 星期四

putty connect with ppk auth


1. 下載putty instatller
2. 開啟pageant.exe 加入PPK檔  
3. 接著用putty就能連上了

2015年6月15日 星期一

XMLHttpRequest cannot load URL 'Access-Control-Allow-Origin' header is present on the requested resource. Origin 'null' is therefore not allowed access.

ws為spring+restful
前端為html+ajax

新增下列程式
package com.cihm.controller;
import java.io.IOException;
import javax.servlet.Filter;
import javax.servlet.FilterChain;
import javax.servlet.FilterConfig;
import javax.servlet.ServletException;
import javax.servlet.ServletRequest;
import javax.servlet.ServletResponse;
import javax.servlet.http.HttpServletResponse;
import org.springframework.stereotype.Component;

@Component
public class SimpleCORSFilter implements Filter {

 public void doFilter(ServletRequest req, ServletResponse res, FilterChain chain) throws IOException, ServletException {
  HttpServletResponse response = (HttpServletResponse) res;
  response.setHeader("Access-Control-Allow-Origin", "*");
  response.setHeader("Access-Control-Allow-Methods", "POST, GET, OPTIONS, DELETE");
  response.setHeader("Access-Control-Max-Age", "3600");
  response.setHeader("Access-Control-Allow-Headers", "x-requested-with");
  chain.doFilter(req, res);
 }

 public void init(FilterConfig filterConfig) {}

 public void destroy() {}

}


web.xml添加
 
       SimpleCORSFilter
       
        com.cihm.controller.SimpleCORSFilter


    SimpleCORSFilter
    /*


參考https://spring.io/guides/gs/rest-service-cors/

2015年6月8日 星期一

[css] window8 + scss(sass) + compass + sublime text3 & modify exist 2 scss project | also provide mac version


//相關安裝
1.install Ruby
2.命令視窗,輸入gem install sass
3.命令視窗,gem install compass

//編輯器
1. in Sublime Text編輯器,按Ctrl + Shift +P鍵,再輸入install。
(沒package control 參考http://lewisli1.blogspot.tw/2015/06/sublime-text3-without-package-control.html)
2. install sass ,SASS snippets ,Compass

//執行
1. cd to your project
compass creat .\(your project)

2.compass watch
請勿關閉此視窗,由於它會自動監控,每當Sublime Text一儲存時,就會立即轉存成css檔
(要到project那層呦)

//編輯器
alt+shift+2 (開兩個視窗)

//執行
將現有css做轉換
命令視窗:
sass-convert style.css style.sass
sass-convert style.css style.scss

//結論
總之就是在sass 資料夾裡面寫scss(sass)檔,
儲存時他會自己幫產出css檔放在stylesheets資料夾裡面

改完後來套套看

sublime text3 without package control


剛在window上裝sublime3 
發現沒有preference裡面
沒有package control,


參考官方教學
https://packagecontrol.io/installation#st3

2015年6月7日 星期日

[java][hibernate] HQL not work because i add constructor with parameter


今天遇到一個問題,就是我的HQL一直不work,

後來看了我與資料庫對應的物件,

在看了這篇http://stackoverflow.com/questions/4488716/java-default-constructor

因為HQL(hibernate query language) need default constructor or non-parameter constructor,

而我那個物件少了non-parameter constructor,因為我有一個constructor是帶有變數的,

根據定義,只要有定義constructor的話,default的就不會產生,所以我需要再新增一個

行為跟default一模一樣的constructor,也就是non-parameter constructor.

2015年6月5日 星期五

tomcat-embed-el-8.0.15.jar - jar not lo aded. See Servlet Spec 3.0, section 10.7.2. Offending class: javax/el/Expression .class


IF you use eclipse & gradle & spring-boot to run app
and you get error like me

error-msg:
tomcat-embed-el-8.0.15.jar - jar not lo aded. See Servlet Spec 3.0, section 10.7.2. Offending class: javax/el/Expression .class

i provide 3 method to solve,
the best way is method B

A:
remove relate jar in below path
F:\workspacegit\.metadata\.plugins\org.eclipse.wst.server.core\tmp0\wtpwebapps\abMartWS\WEB-INF\lib

B:(in eclipse)
  1.import project
  2. gradle refresh all
  3. remove gradle depency lib
  4. gradle refresh all


C: don't use eclispe 

2015年5月28日 星期四

[java] html parser use jsoup lib

complete project https://github.com/cihm/JavaHtmlParser
package com.test.parser;

import java.net.URL;
import java.util.Iterator;

import org.jsoup.Jsoup;
import org.jsoup.nodes.Document;
import org.jsoup.nodes.Element;
import org.jsoup.select.Elements;

public class testJsoup {

 public static void main(String[] args) {
  // TODO Auto-generated method stub
        //online parser 
  //http://try.jsoup.org/~LGB7rk_atM2roavV0d-czMt3J_g
  try{
   
   Document doc = Jsoup.connect("http://en.wikipedia.org/").get();
   Elements newsHeadlines = doc.select("#mp-itn b a");
   // Get first table

   Element table = doc.select("table").first();
   // Get td Iterator
   Iterator <Element> ite = table.select("td").iterator();
   // Print content
   int cnt = 0;
   while (ite.hasNext()) {
    cnt++;
    System.out.println("Value " + cnt + ": " + ite.next().text());
   }
  }catch(Exception e){
   e.printStackTrace();
  }
  
         
 }

}


2015年5月26日 星期二

[linux] crontab 命令裡面 % 的意思是斷行


今天設計了新的java參數讓cronjob跑,
發現cronjob沒有再跑,

後來上網查了發現 是 % 這個符號的關係,
這符號的意思是換行,所以這符號後面的參數我的jar檔就吃不到啦~

引用

A <percent-sign> character in this field shall be translated 
to a <newline<. Any character preceded by a <backslash> (including the '%' ) 
shall cause that character to be treated literally. Only the first 
line (up to a '%' or end-of-line) of the command field shall be 
executed by the command interpreter. The other lines shall 
be made available to the command as standard input. 


2015年5月24日 星期日

[gradle] build gradle project without install gralde on linux


添加如下訊息到你的 builde.gradle中
 task wrapper(type: Wrapper) {
    gradleVersion = '2.3'
} 
執行gradle wrapper

在你linux環境的該專案下執行指令

./gradlew

./gradlew build

if you want install you can link to
http://exponential.io/blog/2015/03/30/install-gradle-on-ubuntu-linux/

[gradle] build jar


添加如下訊息到你的 builde.gradle中

jar {
    baseName = 'solrGradleTest'
    version =  '0.1.0'
} 

預設的產出的jar檔會在專案路徑的build中
EX:
C:\Users\1409035\Documents\GitHub\SolrJava\build\libs\solrGradleTest-0.1.0.jar

2015年5月21日 星期四

[gson] read / write large file use gson stream

in order to handle with read/write "big" file,
so use gson stream


read
    File jsonInputFile = new File(path);
		FileInputStream fisInput;
		JsonReader reader;
		try {
			fisInput = new FileInputStream(jsonInputFile);
			reader = new JsonReader(new InputStreamReader(fisInput, "UTF-8"));

			ArrayList<Map> categoryALHM = gson.fromJson(reader,
					ArrayList.class);
			
			if(null == categoryALHM || categoryALHM.size() == 0){
				log.info(path+":is null or empty");
				return false;
			}
			reader.close();
			fisInput.close();

		} catch (Exception e) {
			log.info(e.getMessage().toString());
			return false;
		}

write
	 File jsonFile = new File(originalDatpath);
		FileOutputStream fos;
		JsonWriter writer;
		try {
			fos = new FileOutputStream(jsonFile);
			writer = new JsonWriter(new OutputStreamWriter(fos, "UTF-8"));
			writer.setIndent(" ");

			Map getCategoryMap = JsonTool.Json2Map(IbobarDataUtil
					.viewCategory());
			ArrayList<HashMap<String, Object>> getCategoryMapList = (ArrayList) getCategoryMap
					.get("list");

			log.info("original category:" + getCategoryMapList);
			
			gson.toJson(getCategoryMapList, ArrayList.class, writer);
			
			writer.close();
			fos.flush();
			fos.close();

		} catch (Exception e) {
			log.info(e.getMessage().toString());
		}

read and write
	File jsonInputFile = new File(organizeDataPath);
		File jsonOutputFile = new File(usingDatPath);

		FileOutputStream fosOutput;
		FileInputStream fisInput;

		JsonWriter writer;
		JsonReader reader;

		try {
			fosOutput = new FileOutputStream(jsonOutputFile);
			writer = new JsonWriter(new OutputStreamWriter(fosOutput, "UTF-8"));
			writer.setIndent(" ");

			fisInput = new FileInputStream(jsonInputFile);
			reader = new JsonReader(new InputStreamReader(fisInput, "UTF-8"));

			writer.beginObject();
			reader.beginObject();

			while (reader.hasNext()) {
				String key = reader.nextName();

				List<Map> bookOranizeList = gson.fromJson(reader,
						ArrayList.class);
				
				writer.name(key);
				gson.toJson(bookOranizeList, ArrayList.class, writer);
			}

			writer.endObject();
			writer.close();
			fosOutput.flush();
			fosOutput.close();

			reader.endObject();
			reader.close();
			fisInput.close();

		} catch (Exception e) {
			log.info(e.getMessage().toString());
		}

2015年5月20日 星期三

[gradle] install nexus sever on ubuntu


install nexus sever on ubuntu

下載
sudo wget http://www.sonatype.org/downloads/nexus-2.1.1.war

改名
mv nexus-2.1.1.war nexus.war

複製到tomcat底下
cp nexus.war /opt/apache-tomcat-7.0.61/webapps/

於瀏覽器輸入如下網址
http://192.168.22.148:8080/nexus

預設的帳密
admin/admin123

錯誤經驗:
裝好後沒設定任何config.
此時sonatype-work以及設定檔等等就會產在路徑root/底下

設定相關config
vim /opt/apache-tomcat-7.0.61/webapps/nexus/WEB-INF/plexus.properties
修改如下內容
nexus-work=/opt/nexus-repo
(你可以自訂你想設定的路徑)


測試上傳的lib有沒有到上述所設定的路徑
(用LeoLib為例子)
於網站http://192.168.22.148:8080/nexus登入後
選取 Repositories -> Release -> Artifact(人工) Upload
-> GAV Definition 選取 GAV Parameters
-> GAV Parameters 設定 ->Group:LeoLib,Artifact:LeoLib,version:1.0

於以下路徑檢查有無上傳成功
/opt/nexus-repo/storage/releases/


gradle.build裡面的設定與nexus 與 Artifact Upload的關係
比如
GAV Parameters 設定 ->Group:LeoLib,Artifact:LeoLib,version:1.0
你的gradle.build裡面的dependencies設定就會如下
compile group:'LeoLib', name:'LeoLib', version:'1.0'


查詢maven上面的lib的 group,name,version. 訊息
http://mvnrepository.com/


security.xml要登入後才會產出來

2015年5月10日 星期日

[searchEngine] [java] Build solr index & search it

this complete project can download from my github
https://github.com/cihm/GradleAndSolr


SolrSearch.java
package com.job;

import java.net.MalformedURLException;
import java.util.List;
import java.util.Map;

import org.apache.log4j.Logger;
import org.apache.solr.client.solrj.SolrQuery;
import org.apache.solr.client.solrj.SolrServerException;
import org.apache.solr.client.solrj.impl.HttpSolrServer;
import org.apache.solr.client.solrj.response.QueryResponse;
import org.apache.solr.common.SolrDocumentList;

import com.vo.SolrArgVo;

public class SolrSearch {

	public static Logger log = Logger.getLogger(SolrSearch.class.getName());

	public boolean solrSearch(SolrArgVo solrArgVo) throws MalformedURLException, SolrServerException{

		//HttpSolrServer solr = new HttpSolrServer("http://10.24.100.237:8080/solr/collection1");
		HttpSolrServer solr = new HttpSolrServer("http://192.168.22.148:8080/solr/collection1");
		SolrQuery query = new SolrQuery();
		
		//英文是精確比對,中文是模糊比對
		//查詢條件
	
		
		query.setQuery( "*:*" );
		//query.setFilterQueries("name:" + "登基", "description:" + "登基", "channel:" + "ylib");
		String keyword = solrArgVo.getKetWord();
		String channel = solrArgVo.getChanneCode();
		query.addFilterQuery("channel:" + channel);
		query.setQuery("name:"+keyword+" OR description:"+keyword); 
		//query.setQuery("name:"+"王道  AND currency:"+"NTD");


		//can use to be get book by cat 
		query.setRows(100); //get row of query result//default is 10
		//query.setQuery("title:國王");
		//query.setQuery("title: art");
	    
	    QueryResponse response = solr.query(query);
	    SolrDocumentList results = response.getResults();
	    System.out.println("NumFound="+results.getNumFound());
	    System.out.println("SIZE="+results.size());
	    //System.out.println(results);
	    //System.out.println(results.get(0).get("title"));
	      for (int i = 0; i < results.size(); ++i) {
	          System.out.println("result "+i+"= "+results.get(i).get("id"));
	    	  System.out.println("result "+i+"="+ results.get(i));
	      }


		return true;
	}
	
}


SolrBuildIndex.java
package com.job;

import java.io.IOException;
import java.net.MalformedURLException;
import java.util.ArrayList;
import java.util.Collection;
import java.util.HashMap;
import java.util.Iterator;
import java.util.List;
import java.util.Map;

import org.apache.log4j.Logger;
import org.apache.solr.client.solrj.SolrServerException;
import org.apache.solr.client.solrj.impl.BinaryRequestWriter;
import org.apache.solr.client.solrj.impl.HttpSolrServer;
import org.apache.solr.common.SolrInputDocument;
import com.util.DataUtil;
import com.util.SolrConstants;

public class SolrBuildIndex {

	public static Logger log = Logger.getLogger(SolrBuildIndex.class.getName());

	public boolean solrBuildIndex() throws MalformedURLException, SolrServerException,IOException{

		
		 HttpSolrServer server = new HttpSolrServer("http://192.168.22.148:8080/solr/collection1");
		 // 清空之前建立的索引數據 // delete all doc
	     server.deleteByQuery( "*:*" );
		
		 //提升性能
		 server.setRequestWriter(new BinaryRequestWriter());
		 
		 String datFilePath =  "C:/Users/1409035/Desktop/FTP_server_backup/candelete/";
		 //String datFilePath = PropertyLoader.getInstance().getValue(DAT_FILE_PATH_KEY);
		 Map zinioMap= (HashMap) DataUtil.DeSerialization(datFilePath + "Zinio" + "-" + "getItemListByCategoryCode" + "-using" + ".dat");
		 Map ylibMap =(HashMap) DataUtil.DeSerialization(datFilePath + "Ylib" + "-" + "getItemListByCategoryCode" + "-using" + ".dat");
		 Map ibobarMap =(HashMap) DataUtil.DeSerialization(datFilePath + "Ibobar" + "-" + "getItemListByCategoryCode" + "-using" + ".dat");
		 Map linkingMap =(HashMap) DataUtil.DeSerialization(datFilePath + "Linking" + "-" + "getItemListByCategoryCode" + "-using" + ".dat");
		 
	     Collection docs2 = new ArrayList();
	     
	     int k=0;
	     Iterator linkingIter = linkingMap.entrySet().iterator();
		 while (linkingIter.hasNext()) {
			Map.Entry entry = (Map.Entry) linkingIter.next();
			ArrayList> bookAL = (ArrayList>) entry
					.getValue();
			for (HashMap hm : bookAL) {
				k++;

				SolrInputDocument doc = new SolrInputDocument();
				doc.addField("id", k);
				doc.addField("channel", "Linking");
				doc.addField("name", hm.get("name"));
				doc.addField("description", hm.get("description"));

				docs2.add(doc);
			}

		 }

		Iterator ylibIter = ylibMap.entrySet().iterator();
		while (ylibIter.hasNext()) {
			Map.Entry entry = (Map.Entry) ylibIter.next();
			ArrayList> bookAL = (ArrayList>) entry
					.getValue();

			for (HashMap hm : bookAL) {
				k++;

				SolrInputDocument doc = new SolrInputDocument();
				doc.addField("id", k);
				doc.addField("channel", "Ylib");
				doc.addField("name", hm.get("name"));
				doc.addField("description", hm.get("description"));
				System.out.println(doc.toString());
				docs2.add(doc);
			}
		}
		     
	     Iterator zinioIter = zinioMap.entrySet().iterator();
	     
	     
	     while(zinioIter.hasNext()) { 
	    	 Map.Entry entry = (Map.Entry) zinioIter.next(); 
	    	 //下述不能用ALHM 去接,否則會拋出ArrayList can't be cast to ALHM的錯誤
	    	 ArrayList> bookAL=(ArrayList>)entry.getValue();
	    	 for(HashMap hm:bookAL){
	    		 k++;
	    		 System.out.println(entry.getKey()+" "+hm.get("Title"));
	    		 
	    		 SolrInputDocument doc = new SolrInputDocument();
				 doc.addField("id", k);
				 doc.addField("channel", "Zinio");
				 doc.addField("name", hm.get("name"));
				 doc.addField("description", hm.get("description"));
				 
				 
				 docs2.add(doc);
	    	 }
	     }
	     
	     
	     Iterator ibobarIter = ibobarMap.entrySet().iterator(); 
	     while(ibobarIter.hasNext()) { 
	    	 Map.Entry entry = (Map.Entry) ibobarIter.next(); 
	    	 ArrayList> bookAL=(ArrayList>)entry.getValue();
	    	 
	    	 for(HashMap hm:bookAL){
	    		 k++;
	    		 
	    		 SolrInputDocument doc = new SolrInputDocument();
				 doc.addField("id", k);
				 doc.addField("channel", "Ibobar");
				 doc.addField("name", hm.get("name"));
				 doc.addField("description", hm.get("description"));
				 
				 docs2.add(doc);
	    	 }
	     }
		 
		 //將ArrayList轉為XML格式
		 //String resultList=GeneralXmlPullParser.reverse(contentAL);
	     System.out.println("=======");
	     //System.out.println(docs2.toString());
	     server.add(docs2);
		
		 server.commit();
		 server.optimize(true, true);
		 
		 System.out.println("finish");


		return true;
	}

}


[gradle] install gradle & use if to build project


window環境下

安裝

. 下載gradle
  (gradle-2.3-all.zip)

. 解壓縮到某路徑
  (C:\Users\1409035\gradle-2.3)
  
. 將bin檔路徑加到環境變數path裡面.  

. 測試有無成功=>command line打上 gradle -v

==========================================
第一個專案

. 創建一個目錄結構如下的專案
       
├── build.gradle
└── src
    └── main
        ├── java
        │   └── tw
        │       └── com
        │           └── handler
        │               └── SoleHandler.java
        └── resources
            └── log4j.properties        
 

. SoleHandler.java 程式如下:
package com.handler;

import org.apache.commons.logging.Log;
import org.apache.commons.logging.LogFactory;
 
public class SolrHandler {
 
    static Log logger = LogFactory.getLog(SolrHandler.class);
 
    public static void main(String[] args) {
        logger.info("Hello World");
    }
 
}


. log4j.properties程式如下:
log4j.rootLogger =Info , A1, A2

#inly 
# A1 is set to be a  ConsoleAppender
log4j.appender.A1 = org.apache.log4j.ConsoleAppender
log4j.appender.A1.layout = org.apache.log4j.PatternLayout
log4j.appender.A1.layout.ConversionPattern = [solrJava.log.%d{yyyyMMdd-HH:mm}][%p][%C-%L] %m%n

# A2 is set to be a file
# produce log record document every  day
#log4j.appender.A2 = org.apache.log4j.FileAppender
log4j.appender.A2 = org.apache.log4j.RollingFileAppender
log4j.appender.A2.layout = org.apache.log4j.PatternLayout
log4j.appender.A2.layout.ConversionPattern = [%d{yyyyMMdd-HH:mm}][%p][%C-%L] %m%n
log4j.appender.A2.File = /opt/app/logs/solrJava.log
log4j.appender.A2.DatePattern = '.'yyyyMMdd-HH:mm
log4j.appender.A2.MaxFileSize=10MB 


. build.gradle程式如下:
/* 引用 java plugin 獲得編譯 java 專案相關的 task $ */
apply plugin: 'java' 
 
/* 引用 application plugin 獲得執行 java 專案相關的 task $ */
apply plugin:'application'
 
/* 執行 application plugin 用到的參數 $ */
mainClassName = "com.handler.SolrHandler"
 
/* 設定 maven repository server $ */
repositories {
    mavenCentral()
}
 
/* 宣告專案的相依函式庫 $ */
dependencies {
    compile group: 'commons-logging', name: 'commons-logging', version: '1.1.1'
    compile group: 'log4j', name: 'log4j', version: '1.2.16'
}

. 使用 gradle 指令執行 run task
結果如下:
C:\Users\1409035\Documents\GitHub\SolrJava> gradle run
:compileJava UP-TO-DATE
:processResources UP-TO-DATE
:classes UP-TO-DATE
:run
log4j:WARN No such property [datePattern] in org.apache.log4j.RollingFileAppender.
[solrJava.log.20150504-20:25][INFO][com.handler.SolrHandler-11] Hello World
BUILD SUCCESSFUL

. build後folder會產生一些東西:
C:.
├─.gradle
│  └─2.3
│      └─taskArtifacts
├─build
│  ├─classes
│  │  └─main
│  │      └─com
│  │          └─handler
│  ├─dependency-cache
│  ├─resources
│  │  └─main
│  └─tmp
│      └─compileJava
└─src
    └─main
        ├─java
        │  └─com
        │      └─handler
        └─resources 

2015年4月30日 星期四

[gradle]let gradle project can be import by eclipse


1. cd yourProject

2. add following to your build.gradle
apply plugin: 'eclipse'

3. $ gradle eclipse

then you can import code to your celipse

[linux] [java] download jdk1.7 64bit on linux and add to environment path


download jdk1.7 64bit for linux 

這樣是不行的
wget http://download.oracle.com/otn-pub/java/jdk/7u55-b13/jdk-7u55-linux-x64.tar.gz" \
-O jdk-7-linux-x64.tar.gz


要加header
wget --no-cookies \
--no-check-certificate \
--header "Cookie: oraclelicense=accept-securebackup-cookie" \
"http://download.oracle.com/otn-pub/java/jdk/7u55-b13/jdk-7u55-linux-x64.tar.gz" \
-O jdk-7-linux-x64.tar.gz


因為下載頁面有一個需要點選接受的按鈕.


解壓縮:
tar -xzf jdk-7-linux-x64.tar.gz -C /opt/

新增環境變數
export PATH=$PATH:/opt/jdk1.7.0_55/bin

export JAVA_HOME=/opt/jdk1.7.0_55/

[searchEngine] install Solr 4.7.2 on linux elasticity


1.
download solr
$ wget http://www.eu.apache.org/dist/lucene/solr/4.7.2/solr-4.7.2.tgz > solr-4.7.2.tgz

2.解壓縮
$ tar -xzf solr-4.7.2.tgz

3.
將/opt/download/solr-4.7.2/example/webapps/solr.war
複製到自己要deploy的路徑裡並解開

$ cp solr.war /opt/app/solrApp/solr

$ jar xvf solr.war
#我是在/opt/app/solrApp/solr 底下解開
  
4.  
將/opt/download/solr-4.7.2/example/solr底下的東西
放到/opt/app/solrApp/底下


5.
放所需的solr lib到 tomcat/lib 下
$ sudo cp -r ext/* /opt/apache-tomcat-7.0.61/lib

6.
搬log檔
cp /opt/download/solr-4.7.2/example/resources/log4j.properties classes/


7.
到/opt/apache-tomcat-7.0.61/conf/Catalina/localhost/
新增solr.xml
$ vim solr.xml
內容如下


8.
重啟
$ sudo sh /opt/apache-tomcat-7.0.61/bin/shutdown.sh 
$ sudo sh /opt/apache-tomcat-7.0.61/bin/startup.sh  
  
  
9.
給權限 
sudo chmod 777 collection1/  


2015年4月27日 星期一

[design pattern] [java] Decorator pattern

這種模式讓你不用修改現有的interface,
並且對其新添加功能,

重點在於Employee.java的第七行,
除了複寫walk的method,還添加了
run的method在裡面.


Human.java
package com.test.decoratorpattern;

public interface Human {

 void walk(String msg);
}


Man.java
package com.test.decoratorpattern;

public class Man implements Human{

 @Override
 public void walk(String msg) {
  System.out.println("class is Man , "+msg);
 }

}


ManDecorator.java
package com.test.decoratorpattern;

public class ManDecorator implements Human {

 protected Human decoratedHuman;

 public ManDecorator(Human decoratedHuman) {
  this.decoratedHuman = decoratedHuman;
 }

 public void walk(String msg) {
  decoratedHuman.walk("class is ManDecorator:"+msg);
 }

}


Employee.java
package com.test.decoratorpattern;

public class Employee extends ManDecorator {

 public Employee(Human decoratedHuman) {
  super(decoratedHuman);
  // TODO Auto-generated constructor stub
 }

 @Override
 public void walk(String msg) {
  decoratedHuman.walk(msg);
  run(decoratedHuman);
 }

 private void run(Human decoratedHuman) {
  System.out.println("class is Employee: Run");
 }

}


testDecorator.java
package com.test.decoratorpattern;

public class testDecorator {

 public static void main(String[] args) {
  // TODO Auto-generated method stub

  Human man = new Man();
  man.walk(" man ");
  
  Human employee = new Employee(new Man());
  employee.walk(" employee ");

        
 }

}


Console
class is Man ,  man 
class is Man ,  employee 
class is Employee: Run

[linux] workbench連不到xampp的資料庫但是網頁可以連到phpmyadmin (環境為本機連到vm)


cd /opt/lampp/etc
vim vim my.cnf
註解他
#skip-networking

並且
因為我是從本機電腦連到vm的mysql

所以新增一個使用者.
主機位置給他 "%"
也就是任意位置
,不然預設的root位置是@localhost
這樣本機會連不到vm
(因為本機的localhost不等於vm的localhost)

[linux][解決] xampp 裝完後發現連不到他的mysql


法一
發現連不到資料庫
http://192.168.22.148/phpmyadmin/


做以下步驟:
cd到/opt/lampp/phpmyadmin

修改內容config.inc.php
$ sudo vim config.inc.php
$ cfg['Servers'][$i]['password']='your password'


進入mysql command line
$ /opt/lampp/bin/mysql -u root -plewis

更新密碼
UPDATE mysql.user SET Password=PASSWORD('root') WHERE User='root';


重啟
$ sudo /opt/lampp/lampp start
$ sudo /opt/lampp/lampp stop


法二
或者是在xampp安裝完時

輸入以下指令
sudo /opt/lampp/lampp security

2015年4月26日 星期日

[linux] install xampp on ubuntu


以下為錯誤步驟 , 可以跳到下面的正確步驟
step1
add ppa
$ sudo add-apt-repository ppa:upubuntu-com/xampp

此時系統會問你要步要加入ppa
到這網址查看內容https://launchpad.net/~upubuntu-com/+archive/ubuntu/xampp
裡面列出一些package
ppa : Personal Package Archive
詳細參考http://article.yeeyan.org/view/213582/193672


step2
$ sudo apt-get update

step3
$ sudo apt-get install xampp

此方法不行因為缺少套件
所以先移除吧
$ sudo apt-get remove xampp
ppa也別忘了移除
$  sudo add-apt-repository --remove ppa:upubuntu-com/xampp


以下為正確步驟
好的我們重來一次

#下載xampp包到指定路徑
$ wget -P /opt/download/xampp64bit.run http://sourceforge.net/projects/xampp/files/XAMPP%20Linux/1.8.3/xampp-linux-x64-1.8.3-2-installer.run/download

#添加權限
$ sudo chmod +x xampp64bit.run

#執行
$ sudo ./xampp64bit.run


#接著會進入安裝畫面,就下一步下一步吧

#啟動 lampp
$ sudo /opt/lampp/lampp start

#看到以下訊息
Starting XAMPP for Linux 1.8.3-2...
XAMPP: Starting Apache...already running.
XAMPP: Starting MySQL...ok.
XAMPP: Starting ProFTPD...ok.


如果要啟動VM就自行運作 xampp
$ sudo vim /etc/rc.local
加入
/opt/lampp/lampp start
exit 0

將網頁放到如下位置即可呈現
/opt/lampp/htdocs/

因為我是用putty連到我的vm
所以測試成功與否就從外部的window來看
結果如下:


xampp 帳/密 xampp/lewis
mysql 障/密 root/lewis
連不到sql的話參考這篇
workbench連不到參考這篇

[linux] Install tomcat7.0.61 on ubuntu with "wget"

安裝tomcat

這邊用wget而不用apt-get install
因為用後者會把一些內容放到不同目錄
這樣不好管理,當然每個人習慣不同.
#下載apache-tomcat-7.0.61.tar.gz
$ wget http://ftp.tc.edu.tw/pub/Apache/tomcat/tomcat-7/v7.0.61/bin/apache-tomcat-7.0.61.tar.gz


#解壓縮到/opt/  ,opt/:一般都是放第三方服務的安裝
$ sudo tar -xzf apache-tomcat-7.0.61.tar.gz -C /opt/


#啟動tomcat
$ sudo sh /opt/apache-tomcat-7.0.61/bin/startup.sh
#會看到如下訊息
Using CATALINA_BASE:   /opt/apache-tomcat-7.0.61
Using CATALINA_HOME:   /opt/apache-tomcat-7.0.61
Using CATALINA_TMPDIR: /opt/apache-tomcat-7.0.61/temp
Using JRE_HOME:        /usr
Using CLASSPATH:       /opt/apache-tomcat-7.0.61/bin/bootstrap.jar:/opt/apache-tomcat-7.0.61/bin/tomcat-juli.jar
Tomcat started.


因為我是用putty 連到我的vm
所以測試成功與否就從外部的window來看
結果如下

#接著要修改使用者帳密
$ sudo vim conf/tomcat-users.xml


改完就可以管理你的app


#重新啟動
$ sudo sh /opt/apache-tomcat-7.0.61/bin/shutdown.sh
$ sudo sh /opt/apache-tomcat-7.0.61/bin/startup.sh


之前有介紹window版本的安裝以及webservice

[linux] remove install app


$ sudo apt-get remove app-name

ex: sudo apt-get remove tomcat7

2015年4月24日 星期五

[linux] crontab 基本使用

這篇主要目的是要說
cronjob執行jar檔 需要給jdk路徑==
WTF
因為看到這篇
http://askubuntu.com/questions/23009/reasons-why-crontab-does-not-work
有時間看一下這篇
http://www.cyberciti.biz/faq/linux-unix-set-java_home-path-variable/
詳細教學可以操考下面兩個網址
https://help.ubuntu.com/community/CronHowto
http://linux.vbird.org/linux_basic/0430cron.php

環境變數可以參考這篇


crontab 設定

edit cronjob 
$ crontab -e

list cronjob 
$ crontab -l

例如
* 19-22 * * * cd /opt/acer/cronjob/channelData;export PATH=$PATH:/usr/lib/jvm/java-1.7.0-openjdk-amd64/bin; java -cp "./*:./lib/*" com.acer.control.ChnelDataFlowHandler ibobar y y 3 y y y twn 0 ""

restart cron
$ sudo /etc/init.d/cron restart

check log
$ cat /var/log/syslog

[linux] export ,設定環境變數 |Environment variable


#列出目前所有變數
export

#添加變數
export PATH=$PATH:/usr/lib/jvm/java-1.7.0-openjdk-amd64/bin

此時打一次exoprt 會發現已經添加

#修改profile
vim /ext/profile
#加入
export PATH=$PATH:/usr/lib/jvm/java-1.7.0-openjdk-amd64/bin

#修改.bashrc
cd ~
vim .bashrc
export PATH=$PATH:/usr/lib/jvm/java-1.7.0-openjdk-amd64/bin

立即生效:
. ~/.bashrc

#測試
echo $PATH

2015年4月23日 星期四

export jar檔時出現 "eclipse class file on classpath not found or not accessible"

因為專案裡面有mark掉某java檔的整個
內容(包含class name),
因為程式碼全部被mark.
這樣bin下面會產不出class檔而導致錯誤,
 所以不能將class name給mark掉.    


結論:
這不知道是eclipse本身的bug又或者是java本來就這樣規定?

[linux] vim 常用指令 |vim common command

用putty連linux時,常要改一些設定檔,crronjob, shell script等等
用vim來改比較快也比較方便.

這邊列出一些常用指令


#首先創建一個文字檔
vim filename.txt

#進入編輯模式
i

#離開編輯模式 
esc

#離開
shift + :
q

#離開並存檔
wq

#下列為一般模式下

#左下上右
hjkl

#進階 一次往下5行
5j

#螢幕向下/上 一頁
ctrl + f/b

#移到該行最前面 
0

#尋找
/keyword

#刪除整列
dd

#複製
yy

#貼上 
p

#復原
u


2015年4月21日 星期二

[ununtu] change time-zone settings from the command line


sudo dpkg-reconfigure tzdata

[linux] 將指令的內容輸出到某檔案


use ">"
date +%Y%m%d > backcronjob.txt
lewis@ubuntu:/opt$ cat backcronjob.txt
20150318

lewis@ubuntu:/opt$ ls -l /opt/app/abStore_data/ > backcronjob.txt
lewis@ubuntu:/opt$ cat backcronjob.txt
total 4
drwxr-xr-x 4 root root 4096 Mar 18 13:14 data

2015年4月20日 星期一

[linux] Run jar on linux with command line


here is java test code
package testJava;

public class testLinuxArg {

 public static void main(String[] args) {

  System.out.println("args lenght:" + args.length);

  for (int i = 0; i < args.length; i++) {
   System.out.println("args:" + i + " is : " + args[i] + " type   is "
     + args[i].getClass() + "  length is " + args[i].length());
  }
 }
}

export as jar,
put it to your linux

run jar on linux
 java -cp "the lib you need" fileName
 ex: java -cp "./*:./lib/*" testJava.testLinuxArg "1" "" "3" $(pwd)


2015年4月16日 星期四

[git] The step of release production code to remote


#project一開始會有兩條branch,
#master(主要開發用) & release(上版用)
#開branch
 git branch release

#push release這個分支 
 #ex:git push origin release
 
#每次要上版

1.merge master to release 
  git merge release maste

2.push to remote
  git push

3.(add tag 會add到當前你在的分支)  
git tag $release-versioNname
 #ex:git tag v1.1.1

git push $repository_name $release-versioNname
 #ex:git push origin v1.1.1

2015年4月13日 星期一

[java] read/write properties file | 讀/寫 properties 檔


package testJava;

import java.io.File;
import java.io.FileInputStream;
import java.io.FileOutputStream;
import java.io.IOException;
import java.io.InputStream;
import java.io.OutputStream;
import java.util.Enumeration;
import java.util.Properties;

public class testProperties {

 private static String propertiesName = "server.properties";
 private static String serverAddr  = "";
 private static Integer serverPort = 0;
 private static Integer threadCnt  = 0;
 
 
 public static void main(String[] args) {
  
  System.out.println("before load Properties");
  System.out.println("serverAddr:"+serverAddr+"\nserverPort:"+serverPort+"\nthreadCnt:"+threadCnt);
  System.out.println("after load Properties");
  loadParams();
  System.out.println("serverAddr:"+serverAddr+"\nserverPort:"+serverPort+"\nthreadCnt:"+threadCnt);
  System.out.println("==================");
  System.out.println("save value to Properties");
  System.out.println("serverAddr:"+serverAddr+"\nserverPort:"+serverPort+"\nthreadCnt:"+threadCnt);
  serverAddr = "192.168.0.0";
  serverPort = 4543;
  threadCnt  = 111;
  saveParamChanges();
  System.out.println("load value form Properties");
  loadParams();
  System.out.println("serverAddr:"+serverAddr+"\nserverPort:"+serverPort+"\nthreadCnt:"+threadCnt);
  System.out.println("==================");
  System.out.println("print all content");
  printThemAll();
 }

 public static  void loadParams() {
     Properties props = new Properties();
     InputStream is = null;
  
     // First try loading from the current directory
  try {
   is = new FileInputStream(propertiesName);
   props.load(is);
   
      serverAddr = props.getProperty("ServerAddress");
      serverPort = new Integer(props.getProperty("ServerPort"));
      threadCnt  = new Integer(props.getProperty("ThreadCount")); 
      
      
  } catch (Exception e) {
   System.out.println(e.getMessage().toString());
  }finally {
   if (is != null) {
    try {
     is.close();
    } catch (Exception e) {
     System.out.println(e.getMessage().toString());
    }
   }
  }

 }
 
 public static void saveParamChanges() {
  OutputStream out = null;
  Properties props = new Properties();
  try {
         props.setProperty("ServerAddress", serverAddr);
         props.setProperty("ServerPort", ""+serverPort);
         props.setProperty("ThreadCount", ""+threadCnt);
         out = new FileOutputStream(propertiesName);
         props.store(out, "This is an optional header comment string");
     }
     catch (Exception e ) {
      System.out.println(e.getMessage().toString());
     }finally {
   if (out != null) {
    try {
     out.close();
    } catch (Exception e) {
     System.out.println(e.getMessage().toString());
    }
   }
  
  }
 }
 
 
 private static void printThemAll() {
   
  Properties prop = new Properties();
  InputStream input = null;
  
  try {
  
   String filename = propertiesName;
   
   input = new FileInputStream(propertiesName);
   prop.load(input);
   
   if (input == null) {
    System.out.println("Sorry, unable to find " + filename);
    return;
   }
   
   Enumeration e = prop.propertyNames();
   while (e.hasMoreElements()) {
    String key = (String) e.nextElement();
    String value = prop.getProperty(key);
    System.out.println("Key : " + key + ", Value : " + value);
   }
  
  } catch (Exception e) {
   System.out.println(e.getMessage().toString());
  } finally {
   if (input != null) {
    try {
     input.close();
    } catch (IOException e) {
     System.out.println(e.getMessage().toString());
    }
   }
  }
  
   }

}


console
before load Properties
serverAddr:
serverPort:0
threadCnt:0
after load Properties
server.properties (系統找不到指定的檔案。)
serverAddr:
serverPort:0
threadCnt:0
==================
save value to Properties
serverAddr:
serverPort:0
threadCnt:0
load value form Properties
serverAddr:192.168.0.0
serverPort:4543
threadCnt:111
==================
print all content
Key : ServerPort, Value : 4543
Key : ServerAddress, Value : 192.168.0.0
Key : ThreadCount, Value : 111


2015年4月9日 星期四

[git] clone specific version & push branch to remote

事情是這樣的.
每次上板前都應該branch一個版本出來
並且push 到server.
樣樣revert比較快.


clone specific version from remote
$ git clone $URL
$ git reset --hard $SHA1
  EX:git reset --hard 5201870025b316252008882aecbd2e2fd8d68787

To again go back to the most recent commit
$ git pull


push branch to remote
$ git remote -v
  shows remote repository name and url
  
//基於此版本 branch 一個 版本出來
$ git branch branch_name

切換 branch
$ git check branch_name

push branch
$ git push repository_name branch_name

2015年4月7日 星期二

[design pattern] [java] Chain of Responsibility Pattern

責任鏈模式物件導向程式設計裡是一種軟體設計模式
它包含了一些命令對象和一系列的處理對象。
每一個處理對象決定它能處理哪些命令對象,
它也知道如何將它不能處理的命令對象傳遞給該鏈中的下一個處理對象。
該模式還描述了往該處理鏈的末尾添加新的處理對象的方法


AbstractLogger.java
package com.test.chainofresponsibilitypattern;

public abstract class AbstractLogger {
 public static int INFO = 1;
 public static int DEBUG = 2;
 public static int ERROR = 3;

 protected int level;

 // next element in chain or responsibility
 protected AbstractLogger nextLogger;

 public void setNextLogger(AbstractLogger nextLogger) {
  this.nextLogger = nextLogger;
 }

 public void logMessage(int level, String message) {
  System.out.println("current class :"+this.getClass().getSimpleName()+"  "+
                     "current(this).level : " + this.level + "  " + 
               "level(from function) = "+ level);

  if (this.level <= level) {
   write(message);
  }
  if (nextLogger != null) {
   //find out whether there have "next"
   nextLogger.logMessage(level, message);
  }
 }

 abstract protected void write(String message);

}


FileLogger.java
package com.test.chainofresponsibilitypattern;

public class FileLogger extends AbstractLogger {

 public FileLogger(int level) {
  this.level = level;
 }

 @Override
 protected void write(String message) {
  System.out.println("File Logger: " + message);
 }
}


ConsoleLogger.java
package com.test.chainofresponsibilitypattern;

public class ConsoleLogger extends AbstractLogger {

 public ConsoleLogger(int level) {
  this.level = level;
 }

 @Override
 protected void write(String message) {
  System.out.println("Console Logger: " + message);
 }
}


ErrorLogger.java
package com.test.chainofresponsibilitypattern;

public class ErrorLogger extends AbstractLogger {

 public ErrorLogger(int level) {
  this.level = level;
 }

 @Override
 protected void write(String message) {
  System.out.println("Error Logger: " + message);
 }
}


ChainPatterntest.java
package com.test.chainofresponsibilitypattern;

public class ChainPatterntest {
 
    private static AbstractLogger getChainOfLoggers(){

       AbstractLogger errorLogger   = new ErrorLogger(AbstractLogger.ERROR);
       AbstractLogger fileLogger    = new FileLogger(AbstractLogger.DEBUG);
       AbstractLogger consoleLogger = new ConsoleLogger(AbstractLogger.INFO);

       errorLogger.setNextLogger(fileLogger);
       fileLogger.setNextLogger(consoleLogger);

       return errorLogger;
       //order is important
       //return the first object you set
    }

    public static void main(String[] args) {
       AbstractLogger loggerChain = getChainOfLoggers();

       loggerChain.logMessage(AbstractLogger.INFO, 
          "This is an information.");

       System.out.println("======================");
       loggerChain.logMessage(AbstractLogger.DEBUG, 
          "This is an debug information.");

       System.out.println("======================");
       loggerChain.logMessage(AbstractLogger.ERROR, 
          "This is an error information.");
    }
 }


console
current class :ErrorLogger  current(this).level : 3  level(from function) = 1
current class :FileLogger  current(this).level : 2  level(from function) = 1
current class :ConsoleLogger  current(this).level : 1  level(from function) = 1
Console Logger: This is an information.
======================
current class :ErrorLogger  current(this).level : 3  level(from function) = 2
current class :FileLogger  current(this).level : 2  level(from function) = 2
File Logger: This is an debug information.
current class :ConsoleLogger  current(this).level : 1  level(from function) = 2
Console Logger: This is an debug information.
======================
current class :ErrorLogger  current(this).level : 3  level(from function) = 3
Error Logger: This is an error information.
current class :FileLogger  current(this).level : 2  level(from function) = 3
File Logger: This is an error information.
current class :ConsoleLogger  current(this).level : 1  level(from function) = 3
Console Logger: This is an error information.


2015年4月5日 星期日

[git] diff : add . & add -u & add -A


先新增三個檔案當作測試用

after_modify.txt
new_add.txt
deleted.txt

並且都git add
==========================
git rm deleted.txt

修改after_modify.txt內容


此時看status如下


git add . 
結果如下:
會發現 deleted.txt 沒有近來


========================== git reset ==========================
git add -u
結果如下:
圖

會發現 new_add.txt 沒有近來

========================== git reset ==========================
git add -A
結果如下:


全都進來了


總結一下:
git add -A :全都進到stages
git add .  :git rm 的會沒有 
git add -u :新增的檔案沒有

[git] 基本git使用 tutirial 2 (branch, merge)


gitk --all //圖形化介面

git branch //列出目前所有branch

git checkout -b issue513  // 由現在的環境為基礎, 建立新的 branch

git checkout issue513 //切換branch


在 branch新增 檔案
並且 add , then commit.


切回 master
git checkout master

merge:
git merge issue513


[git] 不錯的git教學

因為我這邊都只記錄自己常用到的部分,
所以這邊貼上一些當初參考的連結。

http://gogojimmy.net/2012/01/17/how-to-use-git-1-git-basic/

http://blog.longwin.com.tw/2009/05/git-learn-initial-command-2009/

http://backlogtool.com/git-guide/tw/reference/log.html

https://ihower.tw/blog/archives/2622

2015年3月30日 星期一

[design pattern] [java] Template Pattern

template pttern:
use abstract class to define template(behavior)
to execute its methods.
And use some class to extend it.
to override the method of superclass.


Programmer

package com.test.templatepattern;

public abstract class Programmer {

 abstract boolean getUP();
 abstract boolean atCompany();
 abstract boolean Home();
 
 public void dailyRoutine(){
  getUP();
  atCompany();
  Home();
 }
}


Seven
package com.test.templatepattern;

public class Seven extends Programmer {

 @Override
 boolean getUP() {
  System.out.println("sleeping");
  return false;
 }

 @Override
 boolean atCompany() {
  System.out.println("coding");
  return false;
 }

 @Override
 boolean Home() {
  System.out.println("sleeping");
  return false;
 }

}


Leo
package com.test.templatepattern;

public class Leo extends Programmer {

 @Override
 boolean getUP() {
  System.out.println("meeting");
  return false;
 }

 @Override
 boolean atCompany() {
  System.out.println("meeting");
  return false;
 }

 @Override
 boolean Home() {
  System.out.println("meeting");
  return false;
 }

}


Lewis
package com.test.templatepattern;

public class Lewis extends Programmer {

 @Override
 boolean getUP() {
  System.out.println("coding");
  return false;
 }

 @Override
 boolean atCompany() {
  System.out.println("coding");
  return false;
 }

 @Override
 boolean Home() {
  System.out.println("coding");
  return false;
 }

}


testTemplatePattern

package com.test.templatepattern;

public class testTemplatePattern {

 public static void main(String[] args) {
  /*
  template pttern:
  use abstract class to define template(behavior) 
  to execute its methods.
  And use some class to extend it.
  to override the method of superclass.
  */
  
    Programmer lewis = new Lewis();
    lewis.dailyRoutine();
       System.out.println();
      
       Programmer leo = new Leo();
       leo.dailyRoutine();
       System.out.println();
       
       Programmer seven = new Seven();
       seven.dailyRoutine();
       System.out.println();
 }

}


console
coding
coding
coding

meeting
meeting
meeting

sleeping
coding
sleeping


2015年3月28日 星期六

[git] 基本git使用 tutirial 1 (add, commit, push, pull)

由於最近我們team的版本控管要從SVN轉為git,
所以想說寫個基本的git的筆記,
之前都是用github的gui所以對一些commamd還不太熟,
雖然eclipse也支援git的功能,
不過還是練習一下command吧!!

但礙於公司規定所以每晚還是要將git
同步到svn,真是辛苦fai大了!

我們這邊使用的server為gitlab。

首先我們先在gitLab上創一個空的project,
(當然你也可以在本機創好在push上去,會這樣
做是因為gitlab有提供語法XD)


git 與 svn最大不同在於
svn是直接commit到server端,
並且本機不會有其他版本的資訊,

git則是每次commit都是先到自己的本機,
再用push送到server,所以本機會有自己完整
的版本資訊,

其實我還是喜歡用svn的,
自己以前還直接在研究室的電腦架svn server XD,

進入正題:

設定個人資訊:
可以用以下指令查看,
git config --list

user.name=lewisli
user.email=lewisli.acer@gmail.com
又或者是到 .gitconfig中察看,

設定個人資訊
git config --global user.name "lewisli"
git config --global user.email "lewisli.acer@gmail.com"

當然也可以針對此目錄設定local的個人資訊。
http://lewisli1.blogspot.tw/2015/03/git-specify-multiple-users-user-local.html
接著輸入以下指令
用來建立此目錄的git設定檔與gitlab的連結,
mkdir gitTutorial
cd gitTutorial
git init
touch README.md
git add README.md
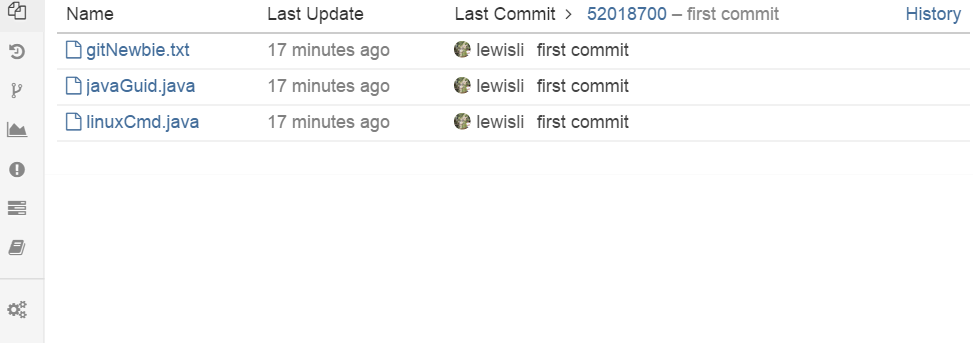
git commit -m "first commit"
git remote add origin http://XXX.xxx.xxx.xxx:7070/lewisli/gitTutorial.git
git push -u origin master

-m的意思是說 要加入message(版本控管 log很重要阿)
其他可用 git commit -h 自己看


如此成功上傳了
可用
git log --stat
git log -p 
來查看commit資訊


clone git server上面的專案
git clone http://XXX.xxx.xxx.xxx:7070/lewisli/gitTutorial.git

通常一個project會有一些不需commit的檔案,
所以可以在.gitignore做設定,
git會去讀這個檔案來知道哪些檔案不需要上傳,
參考
http://lewisli1.blogspot.tw/2015/03/git-gitingore-white-list.html


===================================================

注意1:clone與github上的fork是不同的
詳見:
http://luckyyang.github.io/blog/2013/03/23/fork-you-github/
http://site.douban.com/196781/widget/notes/12161495/note/269163206/

注意2:clone,pull , fecth 是不同的
詳見:
http://blog.mikepearce.net/2010/05/18/the-difference-between-git-pull-git-fetch-and-git-clone-and-git-rebase/

2015年3月26日 星期四

[eclipse] Access restriction on class due to restriction on required library rt.jar


  . 問題 : [eclipse]換workspace時發生
            =>Access restriction on class due to 
              restriction on required library rt.jar 
  
  . 解法 : 方法1
            1. Go to the Build Path settings in the project properties. 
            2 Remove the JRE System Library 
            3 Add it back; Select "Add Library" and select the JRE System Library. 

           方法2 
            window - > java -> compiler -> error/warning -> deprecated and restricted api 把 forbidden reference 將 error change to warning
     

[design pattern] [java] Facade Pattern

我認為wiki寫的蠻清楚的,這邊直接貼上說明
A facade is an object that provides a simplified interface to a larger body of code, such as a class library. A facade can:
  • make a software library easier to use, understand and test, since the facade has convenient methods for common tasks;
  • make the library more readable, for the same reason;
  • reduce dependencies of outside code on the inner workings of a library, since most code uses the facade, thus allowing more flexibility in developing the system;
  • wrap a poorly designed collection of APIs with a single well-designed API (as per task needs).
The Facade design pattern is often used when a system is very complex or difficult to understand because the system has a large number of interdependent classes or its source code is unavailable. This pattern hides the complexities of the larger system and provides a simpler interface to the client. It typically involves a single wrapper class which contains a set of members required by client. These members access the system on behalf of the facade client and hide the implementation details.


Animal.java
package com.test.facadepattern;

public interface Animal {

 void printMsg();
 void getFeet();
 void life();
}


Bird.java
package com.test.facadepattern;

public class Bird implements Animal{

 @Override
 public void printMsg() {
  // TODO Auto-generated method stub
  System.out.println("bird class");
 }

 @Override
 public void getFeet() {
  // TODO Auto-generated method stub
  
 }

 @Override
 public void life() {
  // TODO Auto-generated method stub
  
 }
 

}


Cat.java
package com.test.facadepattern;

public class Cat implements Animal {

 @Override
 public void printMsg() {
  // TODO Auto-generated method stub
  System.out.println("cat class");
 }

 @Override
 public void getFeet() {
  // TODO Auto-generated method stub
  
 }

 @Override
 public void life() {
  // TODO Auto-generated method stub
  
 }


}


Dog.java
package com.test.facadepattern;

public class Dog implements Animal{

 @Override
 public void printMsg() {
  // TODO Auto-generated method stub
  System.out.println("dog class");
 }

 @Override
 public void getFeet() {
  // TODO Auto-generated method stub
  
 }

 @Override
 public void life() {
  // TODO Auto-generated method stub
  
 }


}


Zoo.java
package com.test.facadepattern;

public class Zoo {

 private Animal bird ;
 private Animal cat ;
 private Animal dog ;
 
 public Zoo(){
  bird  = new Bird();
  dog   = new Dog();
  cat   = new Cat();
 }
 
 public void imDog(){
  dog.printMsg();
 }
 
 public void imBird(){
  bird.printMsg();
 }
 
 public void imCat(){
  cat.printMsg();
 }
 
}


testFacadePattern .java
package com.test.facadepattern;

public class testFacadePattern {

 public static void main(String[] args) {
  
  Zoo zoo = new Zoo();
  
  zoo.imBird();
  zoo.imCat();
  zoo.imDog();
  
 }

}


console
bird class
cat class
dog class

[git] .gitingore , white list | ignore every except XXX & XXX


*
#ignore all

!src/
#file under the src/ won't be ignored

!.build.properties
#build.properties won't be ignored

2015年3月25日 星期三

[git] specify multiple users | 指定不同的user (local & global)

因為小弟之前只有再用githib,
當初安裝時他就幫我設定好user的相關資訊,
而且是global的


git config --global user.name "Your Name Here"
git config --global user.email your@email.com

但現在團隊要用gitlab來控管專案
我總不能用我github的身分來做動作吧.

所以隊要開發的專案設一個user

git config user.name "Your Name Here"
git config user.email your@email.com

2015年3月17日 星期二

[java][designPattern] observer pattern

這個用法其實 在android 的 listView or gridview就有被使用
這兩個元件用完都需要呼叫 notifydatachange() 來更新畫面

Color.java
package com.test.observerpattern;

public abstract class Color {
 protected DrawBoard drawBoard;
 public abstract void update();
}


DrawBoard.java
package com.test.observerpattern;

import java.util.ArrayList;
import java.util.List;

public class DrawBoard {
 private List colors = new ArrayList();
 private String state;

 public String getState() {
  return state;
 }

 public void setState(String state) {
  this.state = state;
  notifyAllObservers();
 }

 public void addColor(Color observer) {
  colors.add(observer);
 }

 public void notifyAllObservers() {
  for (Color color : colors) {
   color.update();
  }
 }
}


Pain1.java
package com.test.observerpattern;

public class Pain1 extends Color {
 public Pain1(DrawBoard drawBoard) {
  this.drawBoard = drawBoard;
  this.drawBoard.addColor(this);
 }

 @Override
 public void update() {
  System.out.println("Pain1's color is :"+drawBoard.getState());
 }
}


Pain2.java
package com.test.observerpattern;

public class Pain2 extends Color {
 public Pain2(DrawBoard drawBoard) {
  this.drawBoard = drawBoard;
  this.drawBoard.addColor(this);
 }

 @Override
 public void update() {
  System.out.println("Pain2's color is :"+drawBoard.getState());
 }
}


testObserverPattern.java
package com.test.observerpattern;

public class testObserverPattern {
    public static void main(String[] args) {
     DrawBoard drawBoard = new DrawBoard();

       new Pain1(drawBoard);
       new Pain2(drawBoard);

       System.out.println("Change pain color to red"); 
       drawBoard.setState("red");
       System.out.println("Change pain color to white"); 
       drawBoard.setState("white");
    }
 }


console
Change pain color to red
Pain1's color is :red
Pain2's color is :red
Change pain color to white
Pain1's color is :white
Pain2's color is :white


[java] [designPattern] Null Object Pattern

根據上一篇文章 => java-design-pattern-factory-pattern

這篇做出修改成此篇的標題,


沒列出來的class就同上篇。這篇show出做修改的部分。


NullObject.java

package com.test.nullobjectpattern;
import com.test.factorypattern.animal;
public class NullObject implements animal {

 @Override
 public void printMsg() {
  // TODO Auto-generated method stub
  System.out.println("NullObject class, means i'm null");
 }

 @Override
 public void getFeet() {
  // TODO Auto-generated method stub

 }

 @Override
 public void life() {
  // TODO Auto-generated method stub

 }
}


animalFactory.java
package com.test.factorypattern;

import com.test.nullobjectpattern.NullObject;

public class animalFactory {

 public animal getAnimal(String kind){
  if (null == kind) {
   return null;
  } else if (kind.equalsIgnoreCase("dog")) {
   return new dog();
  } else if (kind.equalsIgnoreCase("cat")) {
   return new cat();
  } else if (kind.equalsIgnoreCase("bird")) {
   return new bird();
  } else {
   return new NullObject();
  }
  
 }
}


TestNullObjectPattern.java
package com.test.nullobjectpattern;

import com.test.factorypattern.animal;
import com.test.factorypattern.animalFactory;


public class TestNullObjectPattern {

 public static void main(String[] args) {
  // TODO Auto-generated method stub
  animalFactory animalfactory = new animalFactory();

  animal dog = animalfactory.getAnimal("dog");
  dog.printMsg();
  
  System.out.println("=========================");
  
  animal cat = animalfactory.getAnimal("cat");
  cat.printMsg();
  System.out.println("=========================");
  
  animal bird = animalfactory.getAnimal("bird");
  bird.printMsg();
  System.out.println("=========================");
  
  animal pig = animalfactory.getAnimal("pig");
  pig.printMsg();
  
 }

}


console
dog class
=========================
cat class
=========================
bird class
=========================
NullObject class, means i'm null


2015年3月16日 星期一

[java ] [Design Pattern] Factory Pattern


animal.java
package com.test.factorypattern;

public interface animal {

 void printMsg();
 void getFeet();
 void life();
}


animalFactory.java
package com.test.factorypattern;

public class animalFactory {

 public animal getAnimal(String kind){
  if (null == kind) {
   return null;
  } else if (kind.equalsIgnoreCase("dog")) {
   return new dog();
  } else if (kind.equalsIgnoreCase("cat")) {
   return new cat();
  } else if (kind.equalsIgnoreCase("bird")) {
   return new bird();
  } else {
   System.out.println("out of type");
  }
  
  
  return null;
 }
}


bird.java
package com.test.factorypattern;

public class bird implements animal{

 @Override
 public void printMsg() {
  // TODO Auto-generated method stub
  System.out.println("bird class");
 }

 @Override
 public void getFeet() {
  // TODO Auto-generated method stub
  
 }

 @Override
 public void life() {
  // TODO Auto-generated method stub
  
 }
 

}


cat.java
package com.test.factorypattern;

public class cat implements animal {

 @Override
 public void printMsg() {
  // TODO Auto-generated method stub
  System.out.println("cat class");
 }

 @Override
 public void getFeet() {
  // TODO Auto-generated method stub
  
 }

 @Override
 public void life() {
  // TODO Auto-generated method stub
  
 }


}


dog.java
package com.test.factorypattern;

public class dog implements animal{

 @Override
 public void printMsg() {
  // TODO Auto-generated method stub
  System.out.println("dog class");
 }

 @Override
 public void getFeet() {
  // TODO Auto-generated method stub
  
 }

 @Override
 public void life() {
  // TODO Auto-generated method stub
  
 }


}


testFactoryPattern.java
package com.test.factorypattern;

public class testFactoryPattern {

 public static void main(String[] args) {
  // TODO Auto-generated method stub
  animalFactory animalfactory = new animalFactory();

  animal dog = animalfactory.getAnimal("dog");
  dog.printMsg();
  
  System.out.println("=========================");
  
  animal cat = animalfactory.getAnimal("cat");
  cat.printMsg();
  System.out.println("=========================");
  
  animal bird = animalfactory.getAnimal("bird");
  bird.printMsg();
  System.out.println("=========================");
  
  animal pig = animalfactory.getAnimal("pig");
  pig.printMsg();
  
 }

}


console
dog class
=========================
cat class
=========================
bird class
=========================
out of type
Exception in thread "main" java.lang.NullPointerException
 at com.test.factorypattern.testFactoryPattern.main(testFactoryPattern.java:23)


2015年3月15日 星期日

[java] Add parameter to httpGet Url by NameValuePair


 ArrayList pairList = new ArrayList();
            pairList.add(new BasicNameValuePair("serviceToken",(String) map.get("serviceToken") ));
            log.info("data to LinkingData:"+pairList.toString());
            String paramString = URLEncodedUtils.format(pairList, "utf-8");
            
            String getUrl = ApiUrl+GetTagListUrl+"?"+paramString;
            System.out.println(getUrl);
            HttpGet request = new HttpGet(getUrl);
            request.setHeader("Content-Type", "application/json");
            
            HttpResponse response = httpClient.execute(request);

            BufferedReader br = new BufferedReader(new InputStreamReader((response.getEntity().getContent())));
           
            for (String temp = ""; temp != null; temp = br.readLine()) {
                //System.out.println(temp);
                output += temp;
            }

2015年3月13日 星期五

[ java ] Convert Milliseconds 2 date & Convert date 2 Milliseconds

package test_fb_api; import java.text.ParseException; import java.text.SimpleDateFormat; import java.util.Calendar; import java.util.Date; import java.util.TimeZone;
public class convertMilliseconds2date {

 public static void main(String[] args) {
  // TODO Auto-generated method stub
  long a= (long) 1.425968092E12;
  long b= (long) 1.4260118825128E12;
  Date date=new Date(b);
  SimpleDateFormat sdf = new SimpleDateFormat("yyyy/MM/dd'T'hh:mm:ss'Z'");
  sdf.setTimeZone(TimeZone.getTimeZone("UTC"));
  String formatTime = sdf.format(date);
  
  System.out.println("convert millisecond to specific date format");
  System.out.println(formatTime);
  System.out.println("");
  
  Date d =new Date();
  try {
    d = sdf.parse("2015/3/27T4:00:54Z");
  } catch (ParseException e) {
   // TODO Auto-generated catch block
   e.printStackTrace();
  }
  long millisec = d.getTime();
  System.out.println("convert specific date format to millisecond ");
  System.out.println(millisec);
  //after convert date to millisecond.
  System.out.println("");
  //convert your result to date
  //insure your method is correct.
  date=new Date(millisec);
  String formatedTime = sdf.format(date);
  System.out.println(formatedTime);
 }

}

console
convert millisecond to specific date format
2015/03/10T06:24:42Z

convert specific date format to millisecond 
1427428854000

2015/03/27T04:00:54Z

2015年3月11日 星期三

[java ] 4 way to copy file & 2 way to copy folder


package test_fb_api;

import java.io.File;
import java.io.FileInputStream;
import java.io.FileNotFoundException;
import java.io.FileOutputStream;
import java.io.IOException;
import java.io.InputStream;
import java.io.OutputStream;
import java.nio.channels.FileChannel;
import java.nio.file.Files;
import java.util.ArrayList;
import java.util.Arrays;
import java.util.HashMap;

import org.apache.commons.io.FileUtils;

public class test4wayCopy {

 public static void main(String[] args) {
  
  System.out.println("copy file");
  String src = "C:/Users/1409035/Desktop/FTP_server_backup/test.txt";
  String des = "C:/Users/1409035/Desktop/FTP_server_backup/candelete/test1.txt";
  copyFileUsingApacheCommonsIO(new File(src), new File(des));
  
  des = "C:/Users/1409035/Desktop/FTP_server_backup/candelete/test2.txt";
  copyFileUsingFileStreams(new File(src), new File(des));
  
  des = "C:/Users/1409035/Desktop/FTP_server_backup/candelete/test3.txt";
  copyFileUsingFileChannels(new File(src), new File(des));
  
  des = "C:/Users/1409035/Desktop/FTP_server_backup/candelete/test4.txt";
  copyFileUsingFileChannels(new File(src), new File(des));
  
  
  System.out.println("done");
  src = "C:/Users/1409035/Desktop/上新版本計畫/eInvoice/";
  des = "C:/Users/1409035/Desktop/FTP_server_backup/candelete/";
  
  copyAllFolder(new File(src), new File(des));
  
  copyAllFolderRecursive(new File(src), new File(des));
  
  System.out.println("copy all folder");
  
 }

 public static void copyAllFolderRecursive(File src, File dest)
 {

  if (src.isDirectory()) {

   // if directory not exists, create it
   if (!dest.exists()) {
    dest.mkdir();
    System.out.println("Directory copied from " + src + "  to "
      + dest);
   }

   // list all the directory contents
   String files[] = src.list();

   for (String file : files) {
    // construct the src and dest file structure
    File srcFile = new File(src, file);
    File destFile = new File(dest, file);
    // recursive copy
    copyAllFolderRecursive(srcFile, destFile);
   }

  } else {
   copyFileUsingApacheCommonsIO(src.getAbsoluteFile(), dest.getAbsoluteFile());
   System.out.println("File copied from " + src + " to " + dest);
  }

 }
 
 
 private static void copyAllFolder(File source, File dest){
  
  try {
   FileUtils.copyDirectory(source, dest);
  } catch (IOException e) {
   // TODO Auto-generated catch block
   e.printStackTrace();
  }
  
 }
 
 /*
  * cover destination file ,although destination file is exist 
  */
 private static void copyFileUsingApacheCommonsIO(File source, File dest)
 {
  try {
   FileUtils.copyFile(source, dest);
  } catch (IOException e) {
   // TODO Auto-generated catch block
   e.printStackTrace();
  }
 }
 
  
 private static void copyFileUsingFileStreams(File source, File dest)
 {
  InputStream input = null;
  OutputStream output = null;
  try {

   input = new FileInputStream(source);
   output = new FileOutputStream(dest);
   byte[] buf = new byte[1024];
   int bytesRead;
   while ((bytesRead = input.read(buf)) > 0) {
    output.write(buf, 0, bytesRead);
   }
   input.close();
   output.close();
  } catch (FileNotFoundException e) {
   // TODO Auto-generated catch block
   e.printStackTrace();
  } catch (IOException e) {
   // TODO Auto-generated catch block
   e.printStackTrace();

  } finally {

  }
 }
 
 /*
  * this one is fastest
  */
 private static void copyFileUsingFileChannels(File source, File dest) {
  FileChannel inputChannel = null;
  FileChannel outputChannel = null;

  try {
   inputChannel = new FileInputStream(source).getChannel();
   outputChannel = new FileOutputStream(dest).getChannel();
   outputChannel.transferFrom(inputChannel, 0, inputChannel.size());
   inputChannel.close();
   outputChannel.close();
  } catch (FileNotFoundException e) {
   // TODO Auto-generated catch block
   e.printStackTrace();
  } catch (IOException e) {
   // TODO Auto-generated catch block
   e.printStackTrace();
  }

  finally {

  }
 }
 
 
 private static void copyFileUsingJava7Files(File source, File dest)
 {
  try {
   Files.copy(source.toPath(), dest.toPath());
  } catch (IOException e) {
   // TODO Auto-generated catch block
   e.printStackTrace();
  }
 }
 
}